Tuesday, May 30, 2023

We The People

Hello and welcome.  I have another card to share that I made for my friend's #inlovingmemory card drive for veterans.  Since I'm still dealing with this migraine, I decided to use the same colors that I used on my last post only this time, I decided to use a couple of old (and I mean OLD) Rubber Monger stamps sets.  I bought both of these at a stamp convention at least a decade ago and have used sparingly.  I'm thinking the store has closed down since I can't find it online anywhere.

I started out by stamping the Declaration of Independence background on corn husk card stock in Tim Holtz chipped sapphire distress ink before over-stamping the fife and drum corps using the same chipped sapphire ink.  I then stippled chipped sapphire, fired brick, walnut stain and old paper distress inks using my blending brushes from Picket Fence Studios before layering and adding star brads from my stash.  I then popped the layered panel up using pop up glue dots before adding some brown fibers from my stash (USEIT2023).  The final touch was some retired Not Too Shabby copper sequins.  I then stamped the saying inside from Stampin Up's Service and Sacrafice (retired) in the chipped sapphire ink.

Challenges entered:
 
 
Retro Rubber
 
 Thanks for stopping by today.  Have a great rest of your week.

Stamps: Rubber Monger
Ink: Tim Holtz Chipped Sapphire, Walnut Stain, Fired Brick, Old Paper
Card Stock: MFP Corn Husk; PTI Enchanted Evening, Scarlett Jewell
Accessories: PFS Blending Brushes, Brads, Bling, Glue, Pop Up Glue Dots, Fibers

Courage

 Hello and welcome.  Today I'd like to share a card I made for a card drive for veterans a friend is doing.  It's take me quite a few days to photograph and upload thanks to the migraine I've been dealing with.  My part of California was in the 90's last week and now we're in the high 60's to low 70's.  Quite a difference in temperatures and a known migraine trigger for me, however, I'll deal with the migraine to avoid the heat any day.
 
My card uses an old, long retired Stampin Up set called Courage that I received as a RAK from a friend (NBUS) and is great for mass producing cards.  I started out by stamping the image, and saying, in memento tuxedo black ink before coloring using Castle Arts pencils and a Prismacolor blender pencil.  Once my coloring was finished, I stippled/blended Tim Holtz chipped sapphire, walnut stain, fired brick and old paper distress inks using my Picket Fence blending brushes to "age" the image a bit before layering and adding some red star brads from my stash.  I then distressed the edges using an old Stampin Up distressing tool before adding it to my card using pop up glue dots.  The final touch was adding the flag stars using a white gel pen.

Challenges entered:


Thanks for stopping by today.  Have a great rest of your week.

Stamps: Stampin Up
Ink: Memento Tuxedo Black; Tim Holtz Chipped Sapphire, Old Paper, Fired Brick, Walnut Stain
Card Stock: PTI Enchanted Evening, Scarlett Jewell; MFP Corn Husk
Accessories: Castle Arts Pencils, Blender Pencil, Brads, Pop Up Glue Dots, PFS Blending Brushes, White Gel Pen, Distressing Tool
 

Monday, May 29, 2023

Happy Memorial Day
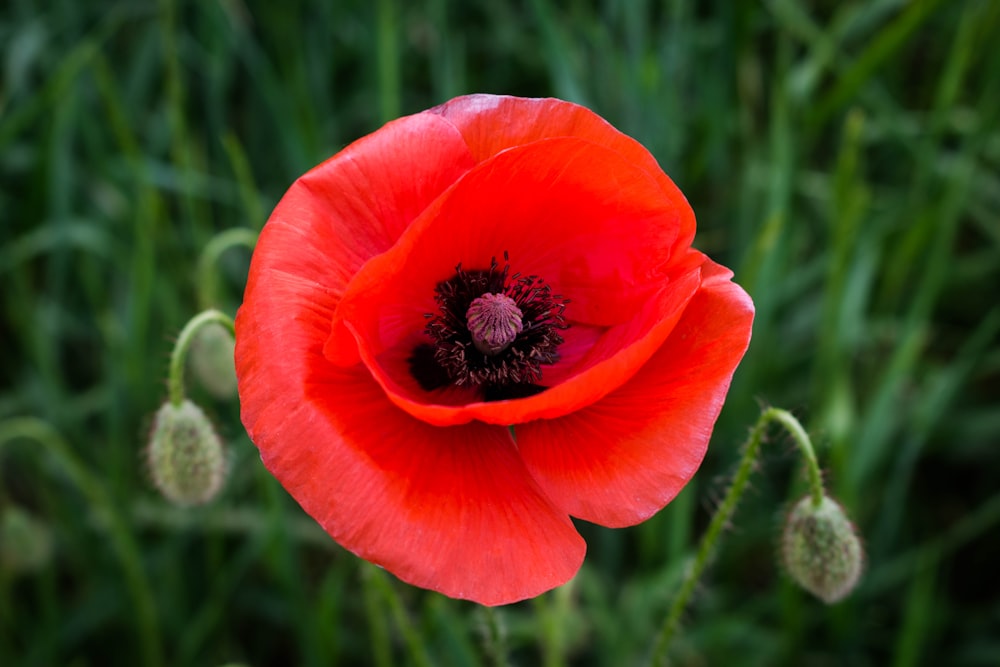
 
 
Red Poppy Pictures | Download Free Images on Unsplash  Hello and welcome.  First I'd like to thank all of the veterans (and their families) that have served/are serving in the armed forces.  I'd especially like to thank those that have given the ultimate sacrifice.  Today we remember and say THANK YOU!!!  To everyone, may you have a safe Memorial Day.


Thursday, May 25, 2023

Woodblock Wednesday On A Thursday May Edition


Hello and welcome.  Today I have another card to share for the Woodblock Wednesday challenge.  For this one, I used the same Stampin Up background as yesterday's card but a different Hero Arts stamp called Garden Flowers Sketch.  I also received this stamp as a RAK from a friend and hadn't used yet (NBUS).  Thank you Amy so much for starting these challenges.  So many of my woodblock stamps are seeing love again.

I started out by stamping the Hero Arts flowers in memento tuxedo ink on to scrap Hammermill white before coloring using my prismacolor watercolor pencils with alcohol blender again.  Once the coloring was finished, I blended some Tim Holtz tumbled glass and mowed lawn distress inks before layering and adding some white brads.  For my card, I again stamped the dots and posies background in mowed lawn before adhering my layered image using glue dots.  I then added some green/white baker's twine from my stash before adding a wooden wheelbarrow I picked up from the dollar store using mini glue dots.  The finishing touches were some Meraki Sparkle Green Illusion bling I won earlier this year (NBUS) and my saying stamped in memento tuxedo black directly on to the wheelbarrow from a long retired Stampin Up Fancy Flexible Sayings wood stamp.  The inside again uses the retired Helen Keller saying from A Stamp In The Hand.
 
inside
 
Challenges entered:
 
Triple B Challenge May 2023 - Birds, Blooms, Butterflies (I used the blooms, colors of mood board) 
Retro Rubber #207 - Anything Goes Using Stamp Over 1 Year Old (floral 1yr, background 1.5, saying in wheelbarrow 10yrs old, inside saying also 10 yrs old)

The Four Seasons

Hero Arts

Triple B Challenge

Retro Rubber


Thanks for stopping by today.  Have a great rest of your week.

Stamps: Hero Arts; Stampin Up; A Stamp In The Hand
Ink: Memento Tuxedo Black; Tim Holt Mowed Lawn, Tumbled Glass Distress 
Card Stock: Hammermill White Scrap; Stampin Up
Accessories: Prismacolor Watercolor Pencils, Alcohol Blender Marker, Bling, Glue, Brads, Glue Dots, Baker's Twine, Wooden Wheelbarrow, PFS Blending Brushes


Wednesday, May 24, 2023

Woodblock Wednesday - May Edition


Hello and welcome.  Today is another Woodblock Wednesday challenge.  If you're any way like me, then you have lots of woodblock stamps that have been collected over the years, so today, we are being challenged to pull those old woodblock stamps out and show them some love.  My card today is uses a few oldies but goodies. 


I started out by stamping an old Hero Arts Pansy Sketch (no longer available) that I received from a friend a few years back and haven't used yet in memento tuxedo black ink on to a watercolor paper panel.  I then pulled out my dusty prismacolor watercolor pencils, colored the image, then blended/water-colored it using an alcohol marker before layering and adding some brads.  My card base is stamped in Tim Holtz broken china distress ink using a long retired Stampin Up background (I think it's Dots n Posies) then added my layered image using glue dots.  As an afterthought, I added a couple of purple silk flowers I've had in my stash for years.  I then blended some tumbled glass distress ink around the image panel before adding a small blue bow, bling and faux stitches to finish the card off.  I really like how it turned out.  The inside has the following saying from A Stamp In The Hand "Keep your face to the sunshine and you cannot see the shadows" by Helen Keller.


Challenges entered:
 
Splitcoaststampers USEIT2023 - Use Your Unloved Stash (stamps, silk flowers, watercolor pencils) 
The Four Seasons May 2023 - See Mood Board (inspired by flowers, colors)
Double D Challenge May 2023 - Flowers (inspired by the flowers) 
 
 
The Four Seasons
 
Double D Challenges
 
Triple B Challenge
 
 
Thanks for stopping by today.  Have a great day.

Stamps: Hero Arts; Stampin Up; A Stamp In The Hand
Ink: Memento Tuxedo Black; Tim Holtz Broken China, Tumbled Glass Distress Inks
Card Stock: Watercolor Paper; Stampin UP
Accessories: Prismacolor Watercolor Pencils, Blender Marker, Brads, Black Gel Pen, Silk Flowers, Glue Dots, Bow, Bling


Tuesday, May 23, 2023

Masculine Hop


Hello and welcome.  Second post from me today.  I am participating in an Instagram Masculine Hop hosted by @kellys.craft.  My card today is featuring a couple of long retired Stampin Up sets: the Old World Map Background and Ships Ahoy.  
 
I started out by stamping the Old World Map background in chipped sapphire distress ink on white card stock before stippling old paper and walnut stain distress inks over my background using my blending brushes from Picket Fence Studios to "age" it a bit before adhering it to a navy card base.  I then took the tall ship image from Ships Ahoy also in chipped sapphire before stippling old paper and walnut stain over it as well before adhering that to a navy card stock scrap.  Since I didn't have matching brads, I made my own "faux brads" by using a small hand held punch before gluing them to the card.  For the inside of the card I used another retired Stampin Up set called Service and Sacrifice.  Here's what the inside looks like:

I'm really happy with how turned out since 1) I stamped it with another migraine and 2) I'm mass producing for a military card drive a friend is hosting.
 
Challenges entered:


Thanks for stopping by today.  Have a great day.

Stamps: Stampin Up
Ink: Tim Holtz Chipped Sapphire, Old Paper, Walnut Stain Distress Inks
Card Stock: Hammermill White; Stampin Up
Accessories: PFS Blending Brushes, Small Hole Punch, Glue


Monday, May 22, 2023

PIP Challenge 2320

 
 Sponsored by


Hello and welcome.  Today begins another challenge over at Pammie's Inky Pinkies and this week we're being sponsored by Jan's Digital Stamps.  I would like to thank them for their sponsorship and for providing images for the design team to use.  My card today features the Sing A Song Of Spring digital set.

I started out by combining the image, and saying, using a watermark program before printing on to Hammermill white card stock then colored using both prismacolor and copic markers.  Once the coloring was finished, I lightly stippled Tim Holtz broken china and walnut stain distress inks using my blending brushes from Picket Fence Studios then layered my image and added vintage copper brads.  I then adhered everything to a pacific pointe card base using glue dots.  The final embellishments were punched photo "holders", a white gel pen highlighting the bird's eyes and some copper bling from I had picked up last year and never used yet. I'm pretty happy with how this turned out especially since I've been dealing with migraines again thanks to the weather whiplash my part of California is having.

Challenges entered:


Triple B Challenges
 
Thanks for stopping by today.  Have a great week and don't forget to join us at Pammie's Inky Pinkies.
 
Stamps: Jan's Digital Stamps
Ink: Tim Holtz Walnut Stain, Broken China Distress Inks
Card Stock: Hammermill White; Stampin Up
Accessories: Computer, Printer, Prismacolor and Copic Markers, Bling, Brads, Glue Dots, PFS Blending Brushes, Glue, SU Photo Frame Punch, White Gel Pen 

Friday, May 12, 2023

Make A Wish With Balloons

 
Hello and welcome.  Today I'd like to share another card I made as guest designer for Gerda Steiner Designs for their May 2023 release.  Today I'm sharing a cute birthday card that could be for all ages.

I started out by stamping my images from the Cupcake Mice set, along with my saying, on scrap Neenah white card stock then coloring using both Prismacolor and Copic markers before layering and adding three white brads.  I then dug through my brad stash to locate the balloon brads I knew I had somewhere but haven't used in a long time.  After adding an orange balloon brad, I then lightly stippled leftover pacific pointe ink around my image panel.  Taking a Marvy balloon punch I've had for years, I punched out red, blue, and yellow balloons to add to my card using both glue dots and pop dots.  For my card, I took a Rubbernecker birthday balloons stencil I had won (and not used yet), and blended Stampin Up summer sun, pure poppy and pacific pointe inks using my blending brushes from Picket Fence Studios before adhering it to my card.  Taking a black gel pen, I highlighted the make a wish before adding faux stitching and then "strings" for my balloons.  The final touches were yellow ice stickles and a clear 3D glaze pen to highlight the birthday hat, eyes and mouse's nose. 
 
Here's the progression of my card:


Prismacolor and Copic markers used

 
Challenges entered:
 
AAA Birthday #49 May - Balloons (brad, punched shapes) 
 
 
Inspiration Station #49
 
 
Colorful Options Challenge
 
 
Thanks for stopping by today.  Have a great day and don't forget to check out the release here.  It's LIVE in the shop now!!

Stamps: Gerda Steiner Designs
Ink: Memento Tuxedo Black; Stampin Up Pacific Pointe, Summer Sun, Pure Poppy
Card Stock: Neenah White; Stampin Up
Accessories: Prismacolor and Copic Markers, Brads, Balloon Punch, Glue Dots, Pop Dots, Black Gel Pen, PFS Blending Brushes, Birthday Balloon Stencils, Yellow Ice Stickles, 3D Glaze Pen


Tuesday, May 9, 2023

29 Again Mouse

Hello and welcome.  I'm excited to share with you my creations as a Guest Designer for Gerda Steiner Designs.  Today I'm on the blog sharing a card made using the new Cupcake Mice stamp set.  Now, I'm always looking for cute, or snarky, images for birthday cards and this set has both!  I'm in love!

I started out by dry embossing a turquoise card using my Big Shot and my Cuttlebug birthday words embossing folder before stippling Tim Holtz broken china distress ink over the raised images then setting aside.  My images/saying were then stamped onto Hammermill white card stock scraps before coloring using my Copic markers and a white gel pen for the cupcake frosting.  Once the coloring was finished, I lightly stippled leftover broken china distress ink around the edges of my mouse before layering and adding some black mini brads.  I then stamped the saying again onto another piece of scrap card stock then highlighted it with a Castle Arts black glitter gel pen before stippling more broken china ink, layering, adding more brads.  Once my saying was popped up on my image panel, I added some silver/white bakers twine along the edge of the card base.  The final touches were some Picket Fence Studios turquoise sequins on the cupcake and next to my main image.
 
Here's the progression of my card:


Markers used


For the inside of my card, I stamped my HAPPY BIRTHDAY sentiment in memento tuxedo black ink and stamped a cute little cupcake from the set in the lower right corner.


 Challenges entered:

 
If You Give A Crafter A Cookie


Thanks for stopping by today.  Have a great day and don't forget to stop by the rest of the design team blogs to leave them some love.

Stamps: Gerda Steiner Designs
Ink: Memento Tuxedo Black; Tim Holtz Broken China Distress Ink
Card Stock: Hammermill White; Stampin Up; Scraps
Accessories: Copic Markers, White Gel Pen, Brads, Glue Dots, Big Shot, Cuttlebug Embossing Folder, PFS Sequins, Pop Dots, Bakers Twine, PFS Blending Brushes


Monday, May 8, 2023

PIP Challenge 2318


  Sponsored by Polkadoodles


Hello and welcome.  Today begins a new challenge over at Pammie's Inky Pinkies and this week we're being sponsored by Polkadoodles.  I would like to thank them for their sponsorship and for providing the images used by the design team.  
 
After printing my image onto Neenah white card stock, I then colored it using both Lyra and Castle Arts pencils before blending Tim Holtz walnut stain and old paper distress inks using a blending brushes from Picket Fence Studios then layered it.  After adding brads, I set it aside and dry embossed a panel using a paisley embossing folder I received as a destash gift.  Once I had stippled Stampin Up tangerine tango ink over the raised images, I adhered it to a brown card using glue dots.  As an afterthought, I then took a fingernail and ran it along the edges of the embossed panel before adding my layered image.  The only other embellishments used were some brown thread along the side/button centers and a black gel pen to draw the whiskers and highlight the eyes.

Challenges entered: 


Thanks for stopping by today.  Have a great day and don't forget to enter the challenge over at Pammie's Inky Pinkies.

Stamps: Polkadoodles
Ink: Tim Holtz Walnut Stain, Old Paper
Card Stock: Neenah White, Stampin Up
Accessories: Computer, Printer, Lyra and Castle Arts Pencils, Big Shot, Paisley Embossing Folder, Buttons, Glue Dots, Fingernail, Black Gel Pen, Thread, Brads


Sunday, May 7, 2023

Sympathetic Koi


 Hello and welcome.  Today I'd like to share a card that I originally started a month ago and thanks to health issues, plus migraines, has taken me until now to finish.  It was inspired by the Splitcoaststampers MAR23VSNE - Cutting Board (or make a tag) challenge.  I decided to pull out a long retired Stampin Up set Oriental Brushstrokes to make my tag.  

After stamping the koi fish image in memento tuxedo black onto scrap Neenah white card stock, I colored it using Castle Arts pencils before stippling Tim Holtz broken china, spiced marmalade and tumbled glass distress inks around it using my Picket Fence blending brushes then layered onto a punched scallop scrap.  I then dusted off my hand held rectangle punch and made a hole in the top of the layers before adding two snippets of scrap ribbon.  Then, taking a white gel pen, I added dots to the scalloped "parts" before setting aside to dry.  My card has a dry embossed layer with memento pear tart and summer sky ink rubbed over the embossed images.  I then added the scalloped koi tag using pop dots before stamping my saying from another retired Stampin Up set called Hope For Comfort.  The final touch was adding a few gems from my Crafty Meraki sparkle green illusion bling pack.  There's also two tiny gems from the pack added to the koi fish eyes.

Challenges entered:
 
Tic Tac Toe #207 - See Inspiration Board (ribbon, dry emboss, free)
 
Tic Tac Toe #207

 
 Stay Crafty With A Blog Named Hero
 
 Thanks for stopping by today.  Have a great day.

Stamps: Stampin Up
Ink: Memento Tuxedo Black, Summer Sky, Pear Tart; Tim Holtz Spiced Marmalade, Broken China, Tumbled Glass
Card Stock: Neenah White; Stampin Up; Scraps
Accessories: Castle Arts Pencils, Marvy Punches, Ribbon Scraps, Bling, Glue, Pop Dots, White Gel Pen, PFS Blending Brushes, Big Shot, Cuttlebug Floral Screen Embossing Folder

Saturday, May 6, 2023

Another Little Sneaky Peek


 Hello and welcome.  Today I'd like to share with you another sneak peek at one of the sets being released this week from Gerda Steiner Designs.  Join us on May 12th to view the full release.

Friday, May 5, 2023

Something Inky Is Coming This Way


Hello and welcome.  I'm excited to be one of the guest designers for May's Gerda Steiner Designs release.  Today I'd like to share with you a little sneaky peek of one of the stamp sets being released.  Join us on May 12th on the Gerda Steiner Designs blog to view the full release!!