Wednesday, June 22, 2011
All Boy! MTME Pretty Pattern Sketch Challenge 15
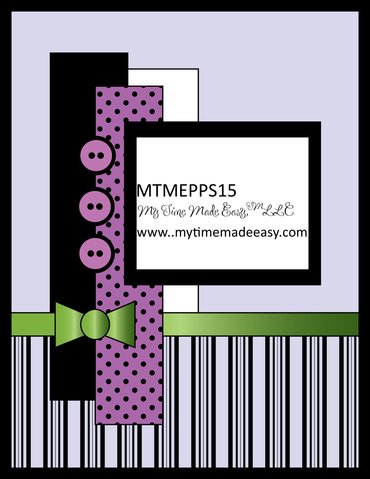
Welcome to another installment of My Time Made Easy's Pretty Pattern Sketch challenge. This week's sketch is perfect for the boys, so I decided to make a masculine birthday card.
I started out by using MTME's Sk8R Boy Digital stamp set. Once I had the images printed out twice, I colored them to match and cut out one for popping up later. Once my designer paper was chosen, card stock layers chosen, the buttons threaded, and the punched corners made ready, assembling was easy peasy!
The sentiment (retired set) and punch are from Stampin Up! with the punch retiring this year. The final touches were adding the photo corners with brads punched into them.
Thanks for stopping by today. Have a really great day.
Stamps: MTME Digital Sk84 Boy, Stampin Up! Birthday Greetings (retired)
Card Stock: White, Artichoke Scrap, Close To Cocoa scrap, Chocolate Chip scrap
Ink: Pallet Burnt Umber, Designer Paper
Accessories: Photo Corner Punch, Brads, Buttons, Thread, Glue Dots, Pop Dots, Prismacolor Markers
Labels:
doodling,
MTME,
My Time Made Easy,
Pretty Patterns
Tuesday, June 21, 2011
Designer Dodge Ball - MMTPT151
Hello and welcome!! This week's teapot challenge is to make a circular cards, no square card or else we had to come in the back door to the tea party. ;) Now I had a bit of a problem with this challenge. It took me about 20 minutes of panic since I don't have any Spellbinders circle dies. It was then I realized I still had my Coluzzle with a circle template.
I decided to use the cute digi provided by Leigh Grady, a PSX stamp, and a retired Stampin Up! retired watercolor flower wheel along with one of my favorite monochromatic color combos - purple!
After stamping, and coloring the main image, I rolled the wheel in orchid opulence ink before sponging lilac ink around the edges and my punched scallop circles. Once I had the digi downloaded and colored, I started my layering before adding some buttons, thread, and ribbon. For the final touch, I added some small Stampendous class-a-peel stickers to the centers of the hat's flowers.
Thanks for stopping by today. Have a great day.
Stamps: Stampin Up! Watercolor Flowers Wheel, PSX Hat Stand, Digital Leigh Grady
Ink: Memento Tuxedo Black, Stampin Up! Orchid Opulence, Lovely Lilac, Almost Amethyst
Card Stock: White, Stampin Up! Orchid Opulence
Accessories: Prismacolor Markers, Computer, Printer, Buttons, Thread, Glue Dots, Ribbon, Stampendous Class-A-Peel Stickers
I decided to use the cute digi provided by Leigh Grady, a PSX stamp, and a retired Stampin Up! retired watercolor flower wheel along with one of my favorite monochromatic color combos - purple!
After stamping, and coloring the main image, I rolled the wheel in orchid opulence ink before sponging lilac ink around the edges and my punched scallop circles. Once I had the digi downloaded and colored, I started my layering before adding some buttons, thread, and ribbon. For the final touch, I added some small Stampendous class-a-peel stickers to the centers of the hat's flowers.Thanks for stopping by today. Have a great day.
Stamps: Stampin Up! Watercolor Flowers Wheel, PSX Hat Stand, Digital Leigh Grady
Ink: Memento Tuxedo Black, Stampin Up! Orchid Opulence, Lovely Lilac, Almost Amethyst
Card Stock: White, Stampin Up! Orchid Opulence
Accessories: Prismacolor Markers, Computer, Printer, Buttons, Thread, Glue Dots, Ribbon, Stampendous Class-A-Peel Stickers
Labels:
Digi Image,
Leigh Grady,
MMTPT,
PSX,
Stampin Up,
Tea Pot Challenge
Tuesday, June 14, 2011
Under The Sea - MTME Digital Release!
Welcome! I hope you're having a great week thus far, and it's about to get better! Today is My Time Made Easy mid month digital release! I have to say all of MTME's products are fantastic and so cute, however, this digital release is my favorite so far. I had a blast layering images together and creating my own sayings to go with them; not to mention finally using some designer paper I've had forever, and stippling Stampin Up! bashful blue around all of the images.
First up is the cutest little octopus you've ever seen, combined with a MTME staple, Singing Silhouette stamped on the rick rack border. After adding my own saying above the image, I printed the octopus out twice on white card stock so I could pop one image up later. After coloring and assembling my card, I added some waterfall ice stickles to highlight the dots on the little guy with pearl stickers highlighting the bubbles.
Next up is friends until the end. After creating this little scene digitally, I thought the saying was quite appropriate. Once I had everything colored and layered, I pulled out some swirled designer paper to use as a background. Again, I added pearl stickers to simulate bubbles and some googlie eyes to the crab to give him some character.
Since I wanted some coral added to the card, I pulled out a Martha Stewart fir twig punch and punched several pieces from scrap card stock. Once those were adhered, I added some more pearl stickers around the coral.
Finally, I have to share a card called friends come in all shapes and sizes using the same scene as the above card, just with a different saying. Once everything was colored and layered, I added some brads, pearl stickers, ribbon, and a clip to finish the card off.
If you haven't tried any of the My Time Made Easy digital products, this is a great time to try them. This release is just too much fun!
Thanks for stopping by today. Have a great week!!
Stamps: My Time Made Easy Underwater Wonder
Ink: Stampin Up! Bashful Blue, Bermuda Bay
Card Stock: White, Designer Paper, Stampin Up! Riding Hood Red, Wild Wasabi, Only Orange, Yoyo Yellow, Baja Breeze, Bermuda Bay
Accessories: Prismacolor Markers, Pearl Stickers, Martha Stewart Punch, Googlie Eyes, Glue Pen, Glue Dots, Brads, Ice Stickles, Stipple Brush, Metal Clip, Ribbon
First up is the cutest little octopus you've ever seen, combined with a MTME staple, Singing Silhouette stamped on the rick rack border. After adding my own saying above the image, I printed the octopus out twice on white card stock so I could pop one image up later. After coloring and assembling my card, I added some waterfall ice stickles to highlight the dots on the little guy with pearl stickers highlighting the bubbles.
Next up is friends until the end. After creating this little scene digitally, I thought the saying was quite appropriate. Once I had everything colored and layered, I pulled out some swirled designer paper to use as a background. Again, I added pearl stickers to simulate bubbles and some googlie eyes to the crab to give him some character.
Since I wanted some coral added to the card, I pulled out a Martha Stewart fir twig punch and punched several pieces from scrap card stock. Once those were adhered, I added some more pearl stickers around the coral.
Finally, I have to share a card called friends come in all shapes and sizes using the same scene as the above card, just with a different saying. Once everything was colored and layered, I added some brads, pearl stickers, ribbon, and a clip to finish the card off.If you haven't tried any of the My Time Made Easy digital products, this is a great time to try them. This release is just too much fun!
Thanks for stopping by today. Have a great week!!
Stamps: My Time Made Easy Underwater Wonder
Ink: Stampin Up! Bashful Blue, Bermuda Bay
Card Stock: White, Designer Paper, Stampin Up! Riding Hood Red, Wild Wasabi, Only Orange, Yoyo Yellow, Baja Breeze, Bermuda Bay
Accessories: Prismacolor Markers, Pearl Stickers, Martha Stewart Punch, Googlie Eyes, Glue Pen, Glue Dots, Brads, Ice Stickles, Stipple Brush, Metal Clip, Ribbon
Labels:
Cards,
Digi Image,
MTME,
My Time Made Easy,
stippling
Wednesday, June 8, 2011
It's Movie and Baby Time - MTMEPPS13
Hello and welcome to another My Time Made Easy Pretty Pattern Sketch Challenge. This week's sketch is so versatile and I had so much fun with it. I know I say that every week, however, this one definitely needs to be referred back to time and time again. For my samples this week, I decided to use My Time Made Easy's new June digital release.
My first sample uses the new Night at the Movies set. After downloading and breaking apart the set, I printed off the vintage movie reel, colored with prismacolor markers, and then stippled Tim Holtz old paper ink around, and over, the image. After layering it, and adding some vintage brads, I layered everything over the new Movie Tickets digital paper. After adding some primas and another vintage brad, I was ready to tackle the inside using the Just 4 You saying from the set.
I really love the countdown numbers that have been included in the set. Totally reminds me of going to the movies before DVD's and seeing the countdown numbers showing just before the movie started. Ok, that really dates me now. ;)
My second sample uses the new About to Pop set in a totally new way combined with the Bringing Home Baby set. I got the idea for this card after seeing the "About to Pop" phrase and thinking; how would it work with a baby shower card. It's works perfectly!
Once both sets were downloaded, broken apart, and the selected images printed off, I pulled out my prismacolor markers to color everything (matching the Movie Tickets digital paper to control the colors used), and then cutting out my images so I could pop a couple of them up later.
Ironically, I started assembling my card from the inside out for some reason. After adding the layered saying, and a designer paper strip on the bottom, I added the baby carriage and lone ticket before stamping the bottle and duck in memento tuxedo black. When I started assembling the front, instead of using ribbon for a border strip, I used the additional tickets downloaded from the About to Pop set and added the stork instead of a flower from the sketch. For the final touches, "baby time" was stamped to each of the tickets, faux brads (punched mini circles) were used on the main image layer, and a Martha Stewart pre-made ribbon bow was added using glue dots.
Thanks for stopping by today. I hope you participate in this week's challenge. We'd love to see you there! Have a great day.
Stamps: MTME Digital Night at the Movies, About to Pop, Bringing Home Baby, MFT It's Shower Time
Ink: Memento Tuxedo Black
Card Stock: MTME Digital Movie Tickets Designer Paper, Stampin Up! Summer Sun, Riding Hood Red, Baja Breeze, White
Accessories: Prismacolor Markers, Glue Dots, Computer, Printer, Pop Dots, Pop Up Glue Dots, Martha Stewart Ribbon Bow
Labels:
baby,
Digi Image,
digital papers,
MFT,
MTME,
Pretty Patterns,
Vintage
Saturday, June 4, 2011
Cherish The Promise Of Spring - In Purple
Hello and Happy Sunday!! I'm still trying to figure out if it's June yet here in the Central Valley, or is it March still? This weekend we've had a winter like storm with rain at my house and snow (if you can believe that) in the mountains 1 1/2hrs from me. What's up with that??
Today I'm sharing two different cards using digital images for the Stamp Something monthly digital challenge and a new digital challenge blog I just discovered - Digital Tuesday - Animals. I just love using digi's since they're easier to store, especially on CD's, and they can be re-sized. The first card I'm showing uses some digital's from Taylored Expressions that were freebies when Taylored Expressions became a Member Company at Splitcoaststampers. Taylor wanted everyone on SCS to join in the first challenge she hosted in the Member Company Forum. If you click the Member Company link to the forum, you should be able to find the thread with the free digi's.
After downloading these images, I colored the butterfly one to match some scrap designer paper I used on another project, layered, and then added ice stickles to highlight the wings. After layering the sentiment, and popping up the main image panel, I added a couple of Recollection paper flowers from Michael's with a dew drop center.
The second card I'm sharing, still using a purple theme, uses a free digital image from Digital Two For Tuesday. This image was posted by Digital Two For Tuesday Mother's Day weekend and I'm in love with this hat image.
I printed off the image twice and colored with prismacolor markers. In order to keep with a slight vintage theme, I stippled Tim Holtz antique linen and old paper around the main image, and slightly over the popped up image too. After adding MFT's Dainty Lace Die-Namic border, I adhered the main image panel at an angle so my primas would fit nicely next to it. The Stampin Up! saying is punched out using Stampin Up's word window punch.
I'm pretty happy with how both of these turned out since I put them together while dealing with another freakin migraine. Thanks for stopping by. Have a great day.
Spring Card
Stamps: Taylored Expressions Digital
Card Stock: White, Stampin Up! Summer Sun, Orchid Opulance, Designer Paper
Ink: Stampin Up! Bashful Blue
Accessories: Stipple Brush, Prismacolor Markers, Recollections Paper Flowers, Dew Drop, Computer, Printer, Brads, Ribbon, Pop Dots, Glue Dots, Ice Stickles
Cherish Card
Stamps: Digital Two For Tuesday Digital Image, Stampin Up! Wonderful Words
Ink: Stampin Up! Perfect Plum, Tim Holtz Old Paper, Antique Linen
Card Stock: White, Stampin Up! Perfect Plum, Mauve Mist, Lavender Lace, Almost Amethyst, Lily Bean Designer Paper
Accessories: Prismacolor Markers, Pop Dots, MFT Die-Namic, Brads, Primas, Glue Dots, Stampin Up! Word Window Punch, Stipple Brushes
Today I'm sharing two different cards using digital images for the Stamp Something monthly digital challenge and a new digital challenge blog I just discovered - Digital Tuesday - Animals. I just love using digi's since they're easier to store, especially on CD's, and they can be re-sized. The first card I'm showing uses some digital's from Taylored Expressions that were freebies when Taylored Expressions became a Member Company at Splitcoaststampers. Taylor wanted everyone on SCS to join in the first challenge she hosted in the Member Company Forum. If you click the Member Company link to the forum, you should be able to find the thread with the free digi's.After downloading these images, I colored the butterfly one to match some scrap designer paper I used on another project, layered, and then added ice stickles to highlight the wings. After layering the sentiment, and popping up the main image panel, I added a couple of Recollection paper flowers from Michael's with a dew drop center.
The second card I'm sharing, still using a purple theme, uses a free digital image from Digital Two For Tuesday. This image was posted by Digital Two For Tuesday Mother's Day weekend and I'm in love with this hat image. I printed off the image twice and colored with prismacolor markers. In order to keep with a slight vintage theme, I stippled Tim Holtz antique linen and old paper around the main image, and slightly over the popped up image too. After adding MFT's Dainty Lace Die-Namic border, I adhered the main image panel at an angle so my primas would fit nicely next to it. The Stampin Up! saying is punched out using Stampin Up's word window punch.
I'm pretty happy with how both of these turned out since I put them together while dealing with another freakin migraine. Thanks for stopping by. Have a great day.
Spring Card
Stamps: Taylored Expressions Digital
Card Stock: White, Stampin Up! Summer Sun, Orchid Opulance, Designer Paper
Ink: Stampin Up! Bashful Blue
Accessories: Stipple Brush, Prismacolor Markers, Recollections Paper Flowers, Dew Drop, Computer, Printer, Brads, Ribbon, Pop Dots, Glue Dots, Ice Stickles
Cherish Card
Stamps: Digital Two For Tuesday Digital Image, Stampin Up! Wonderful Words
Ink: Stampin Up! Perfect Plum, Tim Holtz Old Paper, Antique Linen
Card Stock: White, Stampin Up! Perfect Plum, Mauve Mist, Lavender Lace, Almost Amethyst, Lily Bean Designer Paper
Accessories: Prismacolor Markers, Pop Dots, MFT Die-Namic, Brads, Primas, Glue Dots, Stampin Up! Word Window Punch, Stipple Brushes
Friday, June 3, 2011
Hola!!
Hello!! TGIF!! The weekend is almost here!!
Today, for the Stamp Something digital challenge, I'm sharing a card I made using Whimsy Stamps Chili Chihuahua and MFT's Who's That Fiesta Girl. After downloading the chihuahua image and printing it out onto white card stock, I started coloring with prismacolor markers. Once my coloring was finished, I layered the image onto Stampin Up! card stock and Basic Gray Luscious designer paper.
Taking my MFT Jumbo Scallop Die-Namic, I die cut four borders and then stamped a paisley background onto them in matching ink. Once the borders were added over the designer paper, I adhered my main image and a prima flower using glue dots. Then taking MFT's Who's That Fiesta Girl Hola saying, I stamped that on white card stock in memento tuxedo black ink before punching it out with a Stampin Up! small oval punch. Then, stamping some chili's and a salsa bottle on white scraps, I colored those with some much neglected Stampin Up! markers, cut out, and adhered to the saying outside and inside. Here's a close up of the inside of the card.
Thanks for stopping by today. Have a great weekend!!!
Stamps: Whimsy Digital Chili Chihuahua, MFT Who's That Fiesta Girl, Stampin Up! Fresh Fillers
Ink: Memento Tuxedo Black, Stampin Up! Sage Shadow, Riding Hood Red
Card Stock: MFT Scalloped Red Card, Staples White, Stampin Up! Sage Shadow, Riding Hood Red, Black, Basic Gray Lucious Designer Paper
Accessories: Prismacolor Markers, Stampin Up! Markers, Brads, Die-Namic, Prima, Glue Dots, Stampin Up! Oval Punch,Stamp Something digital challenge
Today, for the Stamp Something digital challenge, I'm sharing a card I made using Whimsy Stamps Chili Chihuahua and MFT's Who's That Fiesta Girl. After downloading the chihuahua image and printing it out onto white card stock, I started coloring with prismacolor markers. Once my coloring was finished, I layered the image onto Stampin Up! card stock and Basic Gray Luscious designer paper.
Taking my MFT Jumbo Scallop Die-Namic, I die cut four borders and then stamped a paisley background onto them in matching ink. Once the borders were added over the designer paper, I adhered my main image and a prima flower using glue dots. Then taking MFT's Who's That Fiesta Girl Hola saying, I stamped that on white card stock in memento tuxedo black ink before punching it out with a Stampin Up! small oval punch. Then, stamping some chili's and a salsa bottle on white scraps, I colored those with some much neglected Stampin Up! markers, cut out, and adhered to the saying outside and inside. Here's a close up of the inside of the card.Thanks for stopping by today. Have a great weekend!!!
Stamps: Whimsy Digital Chili Chihuahua, MFT Who's That Fiesta Girl, Stampin Up! Fresh Fillers
Ink: Memento Tuxedo Black, Stampin Up! Sage Shadow, Riding Hood Red
Card Stock: MFT Scalloped Red Card, Staples White, Stampin Up! Sage Shadow, Riding Hood Red, Black, Basic Gray Lucious Designer Paper
Accessories: Prismacolor Markers, Stampin Up! Markers, Brads, Die-Namic, Prima, Glue Dots, Stampin Up! Oval Punch,Stamp Something digital challenge
Labels:
Die-namics,
Digi Image,
MFT,
Stamp Something,
Stampin Up,
Whimsy
Thursday, June 2, 2011
Springtime Flowers - MTMEPPS12
Hello again!! It's time for another My Time Made Easy Pretty Pattern Sketch Challenge. This week's challenge is using a square card with the sketch. Now square cards are not my speciality, however, this sketch was really easy to use.
I started out by downloading MTME's Harriet Hop A Long Basket digital stamp. Once it was downloaded, I pulled out some Cosmo Cricket Pixie-licious designer paper and pulled out my prismacolor markers. After my coloring was done, I lightly stippled Stampin Up! bashful blue ink around the edges before adding some Making Memories baby brads. I then made a border strip of wasabi card stock, and stamped MTME's Singing Silhouette stamp set using some Versamagic chalk ink. I then sponged Stampin Up! wild wasabi ink around the edges of the entire card. My final touches were primas on both sides of the main image, ribbon with a purple clip, and a butterfly sticker.If you haven't joined us for a Pretty Pattern challenge, you really should. They are a lot of fun and definitely make you think outside the box.
Thanks for stopping by today. Have a great day.
Stamps: MTME Digital Harriet Hop A Long Basket, Singing Silhouette
Ink: Stampin Up! Bashful Blue, Wild Wasabi, Versamagic
Card Stock: Cosmo Cricket Pixie-licious, White, Stampin Up! Wild Wasabi, Orchid Opulance
Accessories: Prismacolor Markers, Stipple Brush, Sponge, Primas, Glue Dots, Brads, Clip, Butterfly Sticker
Wednesday, June 1, 2011
You Make Life Sweet
Hello and Happy Hump Day!! The week is almost over so hang in there.
Today I'm sharing a card I put together a week ago featuring MFT's Pure Innocence Pucker Up set. These little PI kids are just the cutest thing behind Flopsey and Fred Bear. After stamping my image in memento tuxedo black onto MFT Perfect Panels, I pulled out my prismacolor markers and had a blast coloring. Once the coloring was done, I lightly stippled Stampin Up! bashful blue ink around the edges before layering. I did the same thing with the saying as well. Next, I took my MFT Jumbo Scallop Die-Namic and die cut two borders before lightly stippling cocoa ink around the edges.

Once all of the die cutting, coloring and stippling were done, I added some Basic Gray Nook & Pantry designer paper to the card and started assembling. The final touch was some prima flowers and a couple of extra brads in the upper right corner.
Thanks for stopping by today. Have a great day!
Stamps: MFT Pure Innocence Pucker Up
Card Stock: MFT Perfect Panels, Stampin Up! Pretty In Pink, So Saffron, Close To Cocoa, Basic Gray Nook & Pantry Designer Paper
Ink: Memento Tuxedo Black, Stampin Up! Bashful Blue, Close To Cocoa
Accessories: Prismacolor Markers, Brads, Die-Namic, Stipple Brushes, Primas, Glue Dots
Today I'm sharing a card I put together a week ago featuring MFT's Pure Innocence Pucker Up set. These little PI kids are just the cutest thing behind Flopsey and Fred Bear. After stamping my image in memento tuxedo black onto MFT Perfect Panels, I pulled out my prismacolor markers and had a blast coloring. Once the coloring was done, I lightly stippled Stampin Up! bashful blue ink around the edges before layering. I did the same thing with the saying as well. Next, I took my MFT Jumbo Scallop Die-Namic and die cut two borders before lightly stippling cocoa ink around the edges.

Once all of the die cutting, coloring and stippling were done, I added some Basic Gray Nook & Pantry designer paper to the card and started assembling. The final touch was some prima flowers and a couple of extra brads in the upper right corner.
Thanks for stopping by today. Have a great day!
Stamps: MFT Pure Innocence Pucker Up
Card Stock: MFT Perfect Panels, Stampin Up! Pretty In Pink, So Saffron, Close To Cocoa, Basic Gray Nook & Pantry Designer Paper
Ink: Memento Tuxedo Black, Stampin Up! Bashful Blue, Close To Cocoa
Accessories: Prismacolor Markers, Brads, Die-Namic, Stipple Brushes, Primas, Glue Dots
Subscribe to:
Posts (Atom)


