Thursday, December 28, 2017

Unicorn Mysteries


Even though I'm on leave due to my brother's death, I managed to create this card using the Unicorn Mask digi from A&M Memories: https://www.etsy.com/shop/AandMMemoriesdesigns…

She's colored using both prismacolor and copic markers with highlights from a Sakura silver gel pen. You can use this code: BONNIER15 to receive 15% off your order.

As always, thanks for stopping by today and have a great day!! 


Stamps: A and M Memories
Ink: Tim Holtz Tumbled Glass Distress Ink
Card Stock: Stampin Up!, Basic Grey Sultry Designer Paper
Accessories: Prismacolor and Copic Markers, Sakura Silver Gel Pen, White Gel Pen, Brads, Stipple Brush, Prima Flowers, Pop Up Glue Dots, Color Spritzer Tool, Stampin Up Pink Passion Marker


Tuesday, December 26, 2017

After Christmas Sale


I hope everyone had wonderful Christmas! We are having our after Christmas sale at A and M Memories, no code needed! Perfect time to grab some digis and printables like the Heart Burglar Weekly Kit! Visit our shop here:http://etsy.me/2Cb01Mw


As always, thanks for stopping by today and have a great day!  Please also remember to not drink or use drugs (including prescriptions) and drive.  Too many people are injured or killed in accidents caused by impaired drivers.

Friday, December 15, 2017

Taking A Break


This is a post I wish I didn't have to make, but I'm going to be taking a break from blogging, designing, and creating.  My step-brother was killed in an accident this last weekend (Dec 8th) by someone driving without a license because of prior drunk driving convictions.  Unfortunately, the idiot hasn't been charged yet either.  My brother's death is affecting me more than I thought it would and I've been unable to think straight or create. 

Fortunately, the design team I am on for A & M Memories offered me the time off.  Angela is a wonderful and caring person and I highly recommend her shop for digital images and planner printables and accessories.  Please shop from her store and support her.  Thank you.

As always, thanks for stopping by today and have a safe holiday.  Please also don't drink and drive!!!!!  It is more than just yourself being affected if you do.  Thank you.

Saturday, December 2, 2017

Winter Flying By


Hello and welcome.  Today I would like to share a card I made for a couple of challenges using A and M Memories Elf Queen Sparkles and the Winter Wonderland printable that was a freebie over Black Friday.

After importing the Elf Queen Sparkles image into Adobe Photoshop, I typed the saying on the upper left corner before printing off my image to color using both prismacolor and copic markers.  Once that was done, I added a few of the Winter Wonderland stickers to the image before stippleing Tim Holtz broken china around the edges and layering.  Once that was done, I stamped my own background onto the card using a long retired Stampin Up wheel, then added some brads and ribbon.  Finally I added some diamond ice stickles on the wings, dress and parts of the stickers to give the card an icy feel.

I'd like to enter this into the following challenges:

Pammies Inky Pinkies 1748 - Anything Goes

Outlawz Twisted Thursday - Anything Goes

Thanks for stopping by today.  Have a great day.


Stamps: A and M Memories Elf Queen Sparkles and Winter Wonderland, Stampin Up!
Ink: Tim Holtz Broken China, SU Taken With Teal
Card Stock: Stampin Up!
Accessories: Prismacolor and Copic Markers, Stipple Brush, Ribbon, Scor-tape, Brads, Pop Dots, Diamond Ice Stickles


Friday, December 1, 2017

Dining Out And More NBUS


Hello and welcome.  Today I'd like to share a card I've made using Diner Girl Shirley from A and M Memories.  After printing her out, and coloring using both prismacolor and copic markers, I layered the panel before adding some retired Stampin Up! brads then spritzing some real red marker over the panel.  I then made a border using my Martha Stewart Thanksgiving dinner border punch and sponging some red dye ink over it then popping up the image panel.  I then pulled out some red primas, and a never before used (NBUS) red circle clip and (NBUS) red plaid ribbon.  I then highlighted portions of Diner Girl Shirley's uniform using a clear Sakura glaze pen. Finally I added red bling to the center of the flowers.

I would like to enter her into the following challenges:

Outlawz Thursday Twist - Anything Goes

Pammies Inky Pinkies 1748 - Anything Goes


Thanks for stopping by today.  Have a great day.


Stamps: A and M Memories Diner Girl Shirley
Ink: Stampin Up! Real Red
Card Stock: Stampin Up!, Red Plaid Designer Paper
Accessories: Prismacolor and Copic Markers, Martha Stewart Punch, Primas, Glue Dots, Ribbon, Clip, Color Spritzer Tool, Stampin Up Real Red Marker, Brads, Pop Dots, Scor-tape


Friday, November 24, 2017

Holiday Swirls


Hello and welcome.  Today I'd like to share a card I made for a couple of challenges using Skating Isabelle from A and M Memories.

After printing off the image, and coloring using both prismacolor and copic markers, I lightly stippled some Tim Holtz tumbled glass distress ink around the edges before layering.  Once that was done, I added some NBUS (never before used stuff) Basic Grey brads along with a strip of pom-pom ribbon.  Finally I added some silver snowflake stickers I've had in my stash for years and some diamond ice stickles before popping up my image panel over some PTI Rustic Snowflakes designer paper.

Challenges entered:
Pammies Inky Pinkies #1747 - Anything Goes

 Outlawz Festive Fridays - Christmas

Thanks for stopping by today.  Have a great day!

Stamps: A and M Memories
Ink: Tim Holtz Tumbled Glass Distress Ink
Card Stock: Stampin Up!, PTI Rustic Snowflakes Designer Paper
Accessories: Prismacolor and Copic Markers, Stipple Brush, Pop Dots, Brads, Ribbon, Score-tape, Stickers, Sakura Glaze Pens, Diamond Ice Stickles


Wednesday, November 22, 2017

Musings And Such

The last few weeks have been extremely stressful, hectic, and with pain from my migraines and fibromyalgia going off the charts at times.  Most likely from the stress.  I have also been very distracted and unable to concentrate a lot.  Not sure if from the migraine pain or what.  What I do know is I feel like I'm on one of those hamster wheels; trying my best to run and getting nowhere just to have the process start all over again.  These little ones have also helped me keep my sanity, or what's left of it.


Thanks for listening.  Sorry to ramble but I had to tell someone.  :(

Tuesday, November 21, 2017

Pilgrims, Buttons, Brads And Bows - Oh My!


Hello and welcome.  This week, here in the United States, we're celebrating Thanksgiving. A time to be thankful for what God has given us.  Today I'd like to share a card made for this week's Outlawz Twisted Thursday challenge using the Thanksgiving Pilgrim digital image from A and M Memories

After printing off, then coloring, my image using both prismacolor and copic markers, I lightly stippled some Tim Holtz old paper distress ink over and around the image to "age" it a bit before layering.  Once the layering was finished, I added some Stampin Up! not quite navy brads and pop dots before layering it over a punched Thanksgiving dinner border.  I then added a couple of never before used (NBUS) off white buttons along with an ivory rosette bow.  The only other finishing touch I added was sponging not quite navy dye ink around the edges of the card.

Challenges entered:

Outlawz Twisted Thursday - Buttons, Bows, Brads

Pammies Inky Pinkies 1747 - Anything Goes

Since I had two extra pilgrim images already printed out, I went ahead and colored those using prismacolor, koh-i-noor and lyra pencils before adding each to a it's own card to mail out.


For the above card, after spritzing a bit of Stampin Up! old olive marker, I added brads, pop dots, ribbon and finally an olive leaf hat pin as embellishments.


For the final card, I added old olive brads, pumpkin prima roses, along with Stampin Up! olive felt flowers with ice stickle centers as embellishments.

Thanks for stopping by today.  Have a great day and a wonderful and safe Thanksgiving. 

Card 1 -
Stamps: A and M Memories Thanksgiving Pilgrim Digital Image
Card Stock: Stampin Up!, My Minds Eye All Spice Designer Paper
Ink: Stampin Up! Not Quite Navy
Accessories: Prismacolor and Copic Markers, Sponge, Martha Stewart Thanksgiving Dinner Border Punch, Buttons, Brads, Ivory Bow, Glue Dots, Pop Dots

Card 2 -
Stamps: A and M Memories Thanksgiving Pilgrim Digital Image; Stampin Up! Holidays and Wishes
Card Stock: Stampin Up! Chocolate Chip, Handsome Hunter, Basic Black; My Mind's Eye All Spice Designer Paper
Ink: Black
Accessories: Prismacolor Pencils, Color Spritzer Tool, SU Handsome Hunter Marker, Brads, Pop Dots, Leaf Hat Pin, SU Chocolate Ribbon

Card 3-
Stamps: A and M Memories Thanksgiving Pilgrim Digital Image; SU Holidays and Wishes
Ink: Black, Old Olive
Card Stock: Stampin Up!; Jillibean Soup Dutch Mustard Designer Paper
Accessories: Koh-I-Noor and Lyra Pencils, Ranger Glossy Accents, Prima Roses, Pop Dots, Spellbinders Oval Dies, Big Shot, Ice Stickles, SU Old Olive Felt Fusion

Saturday, November 11, 2017

Thank You


To all of our veterans - current, retired, and families of those making the ultimate sacrifice, THANK YOU for your service.  You are truly appreciated.

Wednesday, October 25, 2017

Have A Bang Bang Halloween (and More Never Before Used Stuff)


Hello and welcome.  I'm sharing a card Halloween card I made today using Gangster Babe from A and M Memories.  I really love this image because there's so many different ways to use her besides Halloween (Birthday, Just Because, See You Later, etc).  I also discovered a new (to me) challenge blog called Pixie's Crafty Workshop that would require me to use some of the scrap designer paper, card stock, embellies or ribbon for my card.

After printing off my image and coloring with both prismacolor and copic markers, I stippled some Tim Holtz old paper, tea stain and weathered wood distress inks around the image to "age it" a bit before layering.  Since I was making a Halloween card, I pulled out my Halloween designer paper scraps to see what I had.  After choosing a large scrap for the card I bought at Target a few years back, I pulled out some Graphic 45 fall designer paper scraps to create a border.  I then used a scrap of ribbon to make a bow for her hat adhering it using a micro glue dot.  I then pulled out a (NBUS) never before used Souffle black glaze pen to highlight the buttons on her dress and shoes.  Once all of that was done, I added some silver brads, along with a leftover Halloween charm from a few years back, before popping the image panel up over my "scrap border".  The final touch was adding six paper flowers from my stash with leftover Stampendous bling stickers for the flower centers.

I am very pleased with how the card turned out.  Even better was being able to use up some left over scraps.

Challenges entered:

Pixie's Snippets Playground - week 303 - 304

Pammies Inky Pinkies - 1743 Anything Goes

Thanks for stopping by today.  Have a fantastic day!

Stamps: A and M Memories Gangster Babe Digi
Ink: Tim Holtz Old Paper, Tea Stain, Weathered Wood
Card Stock: Stampin Up!, Scrap Designer Paper (Graphic 45 & Target)
Accessories: Charm, Prismacolor and Copic Markers, Stipple Brushes, Brads, Pop Dots, Glue Dots, Stampendous Bling Stickers, Paper Flowers, Ribbon Scrap


Thursday, October 19, 2017

A Good Read


Hello and welcome.  Today I'm sharing a bookmark I made using Reading Glasses Bookworm from A and M Memories.  Since I suffer from chronic migraines, I read books the "old fashioned way" instead of using an e-reader.

After printing out the image and colored using prismacolor and copic markers, I lightly stippled Tim Holtz tumbled glass distress ink around the edges before layering.  Once my book mark was layered, I placed it inside a plastic bookmark protector from my stash then added the ribbon.

Challenges entered:

Pammies Inky Pinkies 1742 - Anything Goes

Thanks for stopping by today.  Have a great day.


Stamps: A&M Memories Reading Glasses Bookworm
Ink: Tim Holtz Tumbled Glass Distress Ink
Card Stock: Stampin Up!
Accessories: Printer, Computer, Prismacolor and Copic Markers, Stipple Brush, Plastic Bookmark Protector

Thursday, October 12, 2017

Snow Much Fun


Today I'd like to share a card I made using Snow Girl Sandra for the October release over at A and M Memories and for a couple of challenges this week.

After printing off the image onto white card stock, I then colored her using both prismacolor and copic markers before stippling some Tim Holtz tumbled glass distress ink around the edges then layering.  Once the layering was finished, I added some silver brads and a snowflake charm.  I then adhered some Basic Grey Figgy designer paper to add to my card before adding the image panel using pop dots for added dimension.  The finishing touch was a small red bow.

Challenges entered:

Outlawz Festive Friday 100617 - Christmas

Pammies Inky Pinkies 1741 - Anything Goes

Thanks for stopping by today.  Have a great day!


Stamps: A&M Memories Snow Girl Sandra
Ink: Tim Holtz Tumbled Glass Distress Ink
Card Stock: Stampin Up!, Basic Grey Figgy Designer Paper
Accessories: Prismacolor and Copic Markers, Computer, Printer, Stipple Brush, Pop Dots, Brads, Charm, Bow, Glue Dots


Monday, October 9, 2017

Wishing You A Very Merry Christmas


Ho Ho Ho and welcome!!!!  It's release day at A and M Memories and we are sharing our Christmas card inspirations with you.  In some parts of the country it's already beginning to look like Christmas snow-wise.  Here, in my "neck" of the country, we're still dealing with fire season.  While I'm praying for the safety of everyone (including firefighters and animals) in the fires path, I would really love to see some rain or snow, just to help the firefighting efforts and California's drought issues.

However, today I would like to share with you a Christmas card I've made using Mrs Claus from A and M Memories.  After printing my image out and coloring using both prismacolor and copic markers, I sponged some Stampin Up! burgundy ink around the edges then layered.  Since I wanted to keep the focus of the card on the image panel, I used only brads and a small red bow for embellishments and placed the layered image at an angle.  As an afterthought, I spritzed some glorious green marker over the colored image and used a silver glaze pen to highlight the belt buckle.

Now head on over to A and M Memories to snatch her up and all of the other fabulous printables in the shop.  Use the code BONNIER15 (it is case sensitive) to receive a 15% discount on your entire purchase.  Also come join us in the A and M Memories Facebook group for more inspiration and fun.

Thanks for stopping by today.  Have a great day!!


Stamps: A and M Memories Mrs Claus
Ink: Stampin Up! Baroque Burgundy
Card Stock: Stampin Up!, K&Company Christmas Cheer Designer Paper
Accessories: Computer, Printer, Mini Bow, Glue Dots, Sponge, Prismacolor Markers, Copic Markers, Color Spritzer Tool, White Gel Pen,  Stampin Up! Glorious Green Marker


Friday, October 6, 2017

Live Long.....


Hello and welcome!  It's been a while since I've posted due to my migraines, but I'm trying to get back on track again.

Today I'd like to share with you a card I made using Interstellar Toni from A & M Memories Designs.  When I first saw the image, I immediately heard Mr. Spock saying "Live Long and Prosper" so I added the saying using MS Word.  I see so many different sayings that can go with her so your imagination is your only limit.

Once I printed off the image and saying, I pulled out my markers and started coloring.  Once that was done, I stippled some Stampin Up Bermuda Bay ink around the image before layering.  I then pulled out some scrap retro designer paper for the card, then added a dry embossed dot matrix border panel.  After adding some brads, ribbon, punched "stars" with bling, pop dots and a clip, I pulled out a NBUS (never before used stuff) glaze pens to highlight parts of Interstellar Toni's hair, uniform, laser and boots.  I'm really happy with how she's turned out.

I'd also like to enter her in the following challenge:

Pammie's Inky Pinkies #1740

Thanks for stopping by today.  Have a great day.


Stamps: A&M Memories Interstellar Toni
Ink: Stampin Up! Bermuda Bay
Card Stock: White, Designer Paper Scraps
Accessories: Computer, Printer, Stipple Brushes, Brads, Ribbon, Prismacolor and Copic Markers, Glaze Pens, Clip, Fiskars Retro Star Punch, Glue Dots, Bling, Pop Dots


Thursday, August 31, 2017

Musings And Stuff


Sorry to be so absent lately, I've been having some major issues with my chronic migraines and fibromyalgia.  I'm hoping to get back to stamping and blogging as soon as I can.

In the meantime, my family's hearts and prayers go out to everyone affected by Hurricane Harvey.

Thanks for stopping by today.  Have a great day.

Monday, August 7, 2017

Frosty....take me away!!!


Hello and welcome.  How'd you like the little "calgon moment"?  Right now that's how I feel, however, you're not here to listen to that.

I'm sharing with you today a card I made for a few challenges using Whimsy's July freebie Top Of The Morning Snowman.  After downloading him, I printed him off at 3.5 x 5 inches so I could color while still dealing with another migraine.  Once he was printed off, I pulled out both my prismacolor and copic markers and got to coloring before layering and adding snowflake brads I've had in my stash for years.  I also paired him with some PTI designer paper I received as a gift before our move.  I then decided to pull out some never before used(NBUS)  Martha Stewart Christmas washi tape before stippling Tim Holtz broken china distress ink around the edges of the card.  I adhered the image panel using some pop dots before adding ice stickles to add some sparkle.

Challenges entered:

Whimsy Stamps Challenge 97 Anything Goes - With Option of Holiday

Pammie's Inky Pinkies 1732 - Anything Goes

Outlawz Festive Fridays - Christmas

SOS #314 - Countdown To Christmas

Thanks for stopping by today.  Have a great day.

Stamps: Whimsy Snowman
Card Stock: Stampin Up!, PTI Rustic Snowflake Designer Paper, 
Ink: Tim Holtz Broken China Distress
Accessories: Prismacolor and Copic Markers, Pop Dots, Ice Stickles, Recollections White Marker, Snowflake Brads, MS Snowflake Washi Tape


Wednesday, July 19, 2017

Christmas Penguins


Hello and welcome.  Today I am sharing a card made for the week long Christmas In July challenges over at Catch The Bug.  This card is for the Tuesday Christmas In July Bingo challenge.  I chose to go with the Sparkle, Bugaboo Image, Ribbon selections.

After printing my Winter Penguin Trio onto white card stock and colored using both prismacolor and copic markers, I stamped the saying from the Stampin Up! set Heard From The Heart before layering and adding some snowflake brads.  I then pulled out a fireworks designer paper to go with my penguins since the printed fireworks matched my snowflake brads.  After mounting the layered image to the card, I added some glittered ribbon and ice stickles to finish it off.

Thanks for stopping by today.  Have a great day.


Stamps: Bugaboo, Stampin Up!
Ink: Memento Tuxedo Black, Tim Holtz Broken China Distress Ink
Card Stock: Stampin Up!, Firework Designer Paper
Accessories: Prismacolor and Copic Markers, Computer, Printer, Stipple Brush, Glue Dots, Brads, Ribbon, Ice Stickles

Sunday, July 16, 2017

Santa Has Enough Reindeer?


Hello and welcome.  I hope you're enjoying your day and it's filled with fun and lots of relaxation.  Today I'm sharing a card using an oldie but goodie from Bugaboo Digital Stamps called Enough Reindeer.  Now who can resist those puppy eyes!!!  I sure couldn't.  Now onto my card.

I started off by printing the image off onto white card stock then colored it using both prismacolor and copic markers.  Once the coloring was finished, I stippled some Tim Holtz tumbled glass distress ink around the sides then layered using some Papertrey (PTI) Pure Poppy and Spring Rain card stock before adding some mini gold brads.  I then layered some PTI Rustic Snowflake designer paper onto a white card along with some Martha Stewart washi tape from my stash.  After adding my image panel, I added some snowflake bling and a mini golden bow.  I finally added some diamond/waterfall ice stickles to add some sparkle on the image.  Unfortunately, all of the sparkle doesn't show up very well in the pic and my cutting is slightly off due to new glasses. :(

I would like to enter this card into the following challenges:

Bugaboo Christmas In July - Make It Sparkle

Outlawz Festive Friday - July 14th Christmas

Thanks for stopping by today.  Have a fabulous rest of your weekend.


Stamps: Bugaboo Digital Stamps
Card Stock: Georgia Pacific, PTI
Ink: Tim Holtz Tumbled Glass
Accessories: Prismacolor and Copic Markers, MS Washi Tape, Bling, Glue Dots, Stipple Brush, Bow, Ice Stickles

Saturday, July 15, 2017

A Snowman Selfie


Hello and welcome.  Today I'd like to share with you a card that took a few days to make thanks to my migraines.  The image is called Snowman Selfie and is from Sheepski Designs.

I started off by printing the image onto white card stock and then colored using both prismacolor and copic markers.  Once the coloring was finished, I sponged some Cool Caribbean ink around the edges of the image and corresponding layer before adding some button baby brads.  I then pulled out a never before used (NBUS) die cut tag card I've had in my stash for years and then stamped some snowflakes onto the card before sponging more Cool Caribbean ink around the edges.  I finally added some blue fibers and bling that I've had in my stash for years to finish it off.

I'd like to also enter this card into the following challenges:

Outlawz Twisted Thursday - Shaped Card

Not Just Cards #46 - Anything Goes

Pammie's Inky Pinkies #1728 - Anything Goes

Shopping Our Stash #311 - CAS for Simplicity Day

As always, thanks for stopping by today.  Have a great day


Stamps: Sheepski Designs (Snowman Selfie), Stampin Up! (It's Snow Time) 
Ink: Stampin Up! Cool Caribbean
Card Stock: White, Stampin Up! Cool Caribbean
Accessories: Joann's Die Cut Tag Card, Fibers, Prismacolor and Copic Markers, Sponge, Brads, Glue Dots

Monday, July 10, 2017

Camping and Mosquitos


Hello and welcome.  Today I am sharing a card I made using one of Bugaboo Digital Stamps Stella images.  After printing the image onto white card stock and colored using both prismacolor and copic markers, I cut it out then layered before adding brads.  Since I was planning on using some scrap garden green card stock for the card, I stamped a wood plank background before adding the Stella image over it then added a brown fiber to finish it off.

I would like to enter into the following challenges:

Outlawz Monday Greetings 070317 - Vacation
Catch The Bug - Outdoor Fun

Thanks for stopping by today.  Have a great day.

Stamps: Bugaboo Stella Camper, MFP Stamp Shop (background)
Ink: Garden Green
Card Stock: Stampin Up!
Accessories: Printer, Computer, Prismacolor and Copic Markers, Fiber, Brads

Sunday, July 9, 2017

Let Freedom Ring!!


Hello again and welcome.  Sorry for not being around much the last couple of weeks, I have been dealing with a nasty migraine and a fibromyalgia flare up.  Definitely wiped out my mojo.

Today I am sharing a card I've made using Patriotic Angels from Angel's Hearts N Memories.  I printed my digital image slightly larger than normal at 3.5 x 5 inches since I have been dealing with a migraine.  Once the image was printed off and colored using both prismacolor and copic markers, I stippled some Tim Holtz broken china distress ink around the edges of the image before layering and adding brads.  Once that was done, I adhered some patriotic star designer paper I bought from Costco years ago to my card then dry embossed a red strip using a star embossing folder with my big shot.  For an added effect, I lightly stippled some fire brick distress ink over the embossing, added it to the card, then added my image panel using pop dots.  I then sponged some faded jeans distress ink around the edges of the card before adding some star ribbon, clip, ice stickles to the sparkler and crown, then added some prima flowers with a blue jem center.

I'd like to enter this project into the following challenges:

Shopping Our Stash #310 - Flag Day
Not Just Cards #45 - Summer Challenge

Thanks for stopping by today.  Have a great day.


Stamps: AHNM Patriotic Angels
Ink: Tim Holtz Broken China, Fired Brick, Faded Jeans Distress Inks
Card Stock: Stampin Up!, Costco Designer Paper Pack
Accessories: Prismacolor and Copic Markers, Ribbon, Clip, Pop Dots, Bling, Prima Flowers, Big Shot, Star Cuttlebug Embossing Folder, Ice Stickles, Sponge, Stipple Brush

Thursday, June 22, 2017

How To Receive A Copy Rubber Stamp Madness


I absolutely LOVE this magazine and I'm sure you will too. To receive a free copy of RubberStampMadness's Summer issue, send an email to rsm@rsmadness.com and mention this blogsite. The first 100 responders will receive a copy. Here's information about the issue: ATCs are the main focus, with six-pages inside, an ATC-filled cover. Down on the Farm stamp art incorporates cows, chickens, barns and over-sized potatoes in pastoral scenes. Judy and Bobby Duke of B & J's Art Stamps share the story of their home-grown business and samples of Judy's fabulous artwork. A how-to feature explains steps for making Simple "Step Cards," perfect for sharing through the mail. Three terrific tags are showcased in The Tag Shoppe. An album of "Not-Feeling-So-Blue" artwork and more are in this issue.   Here's the issue you'll receive.  


Remember ONLY the first 100 responders will receive the free issue.

Thanks for stopping by today.  Have a great day.

Sunday, June 18, 2017

Winner Winner!


Hi everyone!!  Just found out I was a winner for the Bugaboo Stamps June Theme challenge.  Yay me!!  Here's the card that won:


Now I get to go shopping for some more fun images from Bugaboo Digital Stamps.  Thanks for stopping by today.  Have a great day.

Friday, June 16, 2017

My Teddy Bear And Love


Hello and welcome.  After all of the tragic news lately, I thought I would make something to cheer somebody up.  So that's what I'm sharing with you today - happy mail!

I pulled out and dusted off some of my old and long retired Stampin Up! stamp sets and got to work.  After stamping the bear, wagon, and honey pot (from Bear Necessities and Favorite Teddy Bear) in memento tuxedo black ink onto white card stock, I pulled out both my prismacolor and copic markers.  Once the coloring was finished, I stippled some Tim Holtz tumbled glass distress ink around the edges before adding brushed corduroy distress ink to the bottom of the main image panel for the "ground".  I then lightly stippled some Tim Holtz old paper distress ink over the image panel to "soften" it up and "age" the panel a bit before layering and adding brads.  I then stamped a teddy bear border for the middle of the card using the Teddy and Friends stamp set in walnut stain distress ink before adding the layered image panel to the card.  I then stamped three envelopes from Favorite Teddy Bear in memento tuxedo black on scrap white card stock, colored, then cut out before sliding "into" the wagon making sure they were adhered using micro glue dots.

I would like to enter this card into the following challenges:

Shopping Our Stash #307 - Happy Mail

Pammies Inky Pinkies #1724 - Anything Goes

CardsTV Mailbox Smiles - Anything Goes Challenge #4

Thanks for stopping by today.  Have a great day and a fantastic weekend.


Stamps: Stampin Up! Favorite Teddy Bear, Bear Necessities, Teddy and Friends
Ink: Tim Holtz Tumbled Glass, Walnut Stain, Brushed Corduroy, Old Paper Distress Inks
Card Stock: Stampin Up!
Accessories: Prismacolor and Copic Markers, Fiskars Xacto Knife, Brads, Stipple Brushes

Wednesday, June 14, 2017

Heat and Toasters


Hello and welcome to my sweltering corner of the world.  Ugh!  It's going to be triple digits for the next week and that's after being in the 60's with thunderstorms two days ago (Sunday to be exact).  Mother Nature you're drunk!!

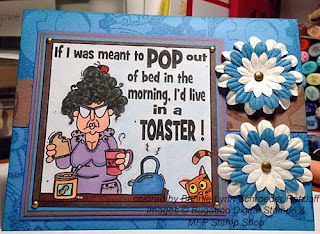
Speaking of heat, I'd like to share a card with you that took me a few days to make thanks to migraines.  Of course, I'm using another favorite Bugaboo Digital Stamp.  This one is called Margaret Live In A Toaster which pretty much sums up the temperatures for the next week.  It's also perfect for the weekly challenge over at the Bugaboo Stamps blog.  I am not one to get out of bed quickly anymore.  Especially dealing with chronic migraines and pain.  So a bit about my card now.

After I printed off Margaret and colored her using both prismacolor and copic markers, I filled in the white areas inside the frame using some Stampin Up chalk and an eye shadow applicator before layering.  Once all the layering was finished, and brads added, I stamped the card using a gear background stamp from MFP Stamp Shop (now temporarily closed) before stippling some CTMH Dutch Blue dye ink around the edges.  My only embellishments are some Recollections paper flowers with brad centers.

Challenges entered:

Catch The Bug - Fast & Furious

Pammie's Inky Pinkies 1724 - Anything Goes

Not Just Cards - #45 Summer Anything Goes

Thanks for stopping by today.  Have a great day.

Stamps: Bugaboo Margaret Live In A Toaster, MFP Stamp Shop Gear Up
Ink: CTMH Dutch Blue
Card Stock: Stampin Up
Accessories: Prismacolor and Copic Markers, Stipple Brush, Brads, Chalk, Eye Shadow Applicator, Recollections Paper Flowers, Glue Dots

Friday, June 2, 2017

Sending You Sunshine


Hello and welcome.  Today I am sharing a card I made for a friends grandfather using the Frame It - You Are My Sunshine digi from Bugaboo.  I don't see it in the new store so it must be retired now.

Once I printed it off and colored using both prismacolor and copic markers, I stippled some Tim Holtz broken china distress ink around the edges of the frame before layering.  Once that was done, I secured the layers using some Recollections cloud brads, added a cloud die cut border stippled with broken china ink, and then added the image panel.  My final touches were sponging some Tim Holtz wild honey ink around the edges of the card before adding a floral spray using Martha Stewart punches then highlighting using ice stickles.

Challenges entered:

Catch The Bug Color Challenge

Thanks for stopping by today.  Have a great day!!

Stamps: Bugaboo You Are My Sunshine (retired)
Ink: Tim Holtz Broken China, Wild Honey
Card Stock: Stampin Up!
Accessories: Prismacolor and Copic Markers, Stipple Brush, Sponge, Martha Stewart Punches, Brads, TCP Cloud Border Die, Big Shot, Ice Stickles.

Wednesday, May 31, 2017

Star Wars and Duct Tape


Hi there and welcome.  Today I'm sharing a card I made for the Stella Says Sketch #510 over at Bugaboo Digital Stamps.  I took a bit of creative liberty with the sketch by putting a dew drops where the saying was supposed to be since my saying is part of the stamp.  Here's the sketch.


I started off by printing one of my favorite images from Bugaboo called Frame it - Stella and Gus - Duct Tape onto white card stock and then coloring it using both prismacolor and copic markers.  Once the coloring was finished and the image layered, I added some baby brads then stamped a background on the card using the retired Stampin Up Itty Bitty Backgrounds in basic grey ink.  Instead of adding a ribbon or border for the middle, I pulled out my husband's roll of black duct tape and used that instead. Instead of ribbon at the top, I used some black twine instead.

Thanks for stopping by today.  Have a great day!

Stamps: Bugaboo Stella And Gus - Duct tape, Stampin Up! Itty Bitty Background
Ink: Stampin Up! Basic Grey
Card Stock: Stampin Up!
Accessories: Prismacolor and Copic Markers, Printer, Laptop, Dew Drops, Glue Dots, Black Twine, Baby Brads

Saturday, May 27, 2017

Forever In Poodle Skirts


Hi there and welcome.  Today I am sharing another card I've made for the new release over at Angel's Hearts & Memories.  Today's image just reminds me of my mom so much when she was younger and cancer free. You are so missed mom.  I love you.

After I printed off Poodle Skirt Cristina and colored her using both prismacolor and copic markers, I sponged some Stampin Up! Bermuda Bay dye ink around her before layering then adding some white brads and prima flowers.  I created my card using some white pre-folded white card stock from Michael's and added a panel of  (NBUS - never before used stuff) "Mom's Diner" designer paper from my stash (think I bought from Michael's years ago).  The "Mom's Diner" designer paper was an impulse buy at one time and has sat waiting for the perfect image to pair it to.  Once the designer paper was adhered to the card, I sponged some more Stampin Up! Bermuda Bay ink around the edges before adding a matching "star" border using my Fiskars star punch, then added some aquamarine ribbon then my image panel.  The final touch was adding a forever charm clip then coloring the poodle on Cristina's skirt using a white gel pen.

Thanks for stopping by today.  Have a great day and a safe Memorial Day weekend here in the States.

Stamps: Angel's Hearts & Memories Poodle Skirt Cristina
Ink: Stampin Up! Bermuda Bay
Card Stock: Stampin Up!, Mom's Diner Designer Paper, Recollections Pre-Folded White Card Stock
Accessories: Prismacolor and Copic Markers, Brads, Sponge, Fiskars Star Punch, Brads, White Gel Pen, Glue Dots, Prima Flowers, Forever Charm Clip, Ribbon

Let's Do The Charlston


My second try writing this post since blogger ate the first one just as I was saving the finished copy.  Ugh!

Hello and welcome.  I would like to share a card made using Flapper Helen from the new release over at Angel's Hearts & Memories.  After I printed off the image onto white card stock and colored using both prismacolor and copic markers, I lightly stippled some Tim Holtz tumbled glass distress ink around the edges before layering and adding some silver baby brads.  Then I adhered a panel of Die Cuts With A View (DCWV) glitter stack designer paper onto a white pre-folded card.  Once that was done, I stamped a border using a long retired Stampin Up! set called Fresh Fillers onto a  basic grey scrap.  Once that was done, I adhered both the border and image panels to the card using glue dots before tying some silver cord around one side and adding two silver feather charms.  My final embellishments were pink glittered prima flowers, pink bling and coloring the pearl necklace using a white gel pen.

I would also like to enter this card in the following challenges:


Thanks for stopping by today.  Have a great day and a safe Memorial Day weekend here in the States.


Stamps: Angel's Hearts & Memories Flapper Helen Digi, Stampin Up! Fresh Fillers
Ink: Tim Holtz Tumbled Glass Distress Ink, Stampin Up! Basic Grey
Card Stock: Stampin Up!, Michael's Pre-Folded White Card Stock, DCWV Glittered Designer Paper
Accessories: Computer, Printer, Prismacolor and Copic Markers, Bling, White Gel Pen, Feather Charms, Silver Cord, Silver Baby Brads, Glue Dots, Pink Glittered Prima Flowers

I Love Rock N Roll...

 
..."put another dime in the jukebox baby".  Gotta love Pat Benatar.

Welcome everyone!!! This is my first blog post as a new design team member for Angel's Hearts and Memories.  The card I am sharing with you today is from this months release and the image is called Rock Star Molly.  I had SO much fun coloring her up while having Pat Benatar running through my head; hence the title above.

After I printed off Rock Star Molly onto white card stock and colored using both prismacolor and copic markers, I stippled some Tim Holtz tumbled glass distress ink around the edges of the image panel before layering then adding some music note brads I found in my stash.  I also decided to layer the card using some music note designer paper I found before adding a die cut musical score border then sponged some Tim Holtz broken china distress ink around the edges of the card to match Molly. Before I adhered my main image panel, I pulled out one of the music note brads then reattached it with some Prima flowers underneath.  The final touches were adding some die cut music notes and then the believe saying.

I also want to enter this into the following challenges:

Shopping Our Stash - Music Notes

Pammies Inky Pinkies 1721 - Anything Goes

Thanks for stopping by today.  Have a great day and a safe Memorial Day Weekend here in the States.

Stamps: Angel's Hearts & Memories Rock Star Molly
Ink: Tim Holtz Broken China, Tumbled Glass
Card Stock: Stampin Up!, Music Note Designer Paper
Accessories: MFT Music Note Dies, CC Designs Music Note Border Die, Prismacolor and Copic Markers, Stipple Brush, Sponge, Believe Brad, Recollection Music Note Brads, Glue Dots, Primas

Saturday, May 20, 2017

Ladybug Spring


Hello and again welcome.  Today I'm sharing a card I made using some NBUS (never before used stuff).  It's amazing what moving uncovers.

I started out by stamping my ladybug/saying stamp in memento tuxedo black onto white card stock then colored using prismacolor and copic markers.  Once the coloring was finished, I applied some light blue chalk over and around the image and saying.  Then I used my Marvy Uchida mega jumbo scalloped punch to punch the image out before sponging regal rose ink around the edges.  I then adhered the NBUS Echo Park Country Drive to the card before adding a border of K&Co fabric using glue dots then sponged regal rose ink around the card, then added a ribbon.  Once that was finished, I then added the image/saying using dimensionals. I then cut the ancho of a ladybug button off before adding that using pop up glue dots.  My final embellishments were crystal ice stickles and a floral spray I made using Martha Stewart punches.

I would like to enter this card into the following challenges:

Shopping Our Stash Project Runway - Use Fabric

Outlawz Monday Greetings - Spring

Thanks for stopping by today.  Have a great day.


Stamps: Stampendous
Ink: Memento Tuxedo Black, Stampin Up! Regal Rose Dye Ink
Card Stock: Stampin Up!, Echo Park Country Drive Designer Paper
Accessories: Prismacolor and Copic Markers, Stampin Up! Chalk, Applicator, Button, Glue Dots, K&Co Fabric, Martha Stewart Punches, Mouse Pad, Stylus

Wednesday, May 17, 2017

Having Flies

Hi there!  My second post for today.  For my Festive Friday post, please scroll down one.  Thanks.

The second card I'm sharing with you uses a long retired Stampin Up! set called Frogs and Flies and was made for this week's Clean And Simple Frog challenge over at the Outlawz.  After stamping the main image and coloring with copic markers, I lightly spritzed a green galore marker using the Inkworks Color Spritzer tool before adding some green baby brads as my only embellishment.  Once the layered main image was adhered to the card using glue dots, I inked the edges of the card using memento cottage ivy dye ink.

Thanks for stopping by today.  Have a great day.

Stamps: SU Frogs and Flies
Ink: Memento Tuxedo Black, Cottage Ivy
Card Stock: SU
Accessories: Copic Markers, Glue Dots, Brads

Dear Santa...


Hello and welcome.  Today I am sharing a card I've made using the Stella Santa from Bugaboo Digital Stamps combined with a retired Stampin Up! background.

I started off by downloading then printing the Stella Santa Note onto white card stock then coloring using both prismacolor and copic markers.  Once my coloring was finished, I stippled some Tim Holtz broken china distress ink over and around the image before layering and adding brads.  Once my main image panel was finished, I stamped the retired  Holiday Print background from Stampin Up! in glorious green dye ink onto the card.  Once that was done, I punched a snowflake border from blue scrap card stock using a Martha Stewart snowflake embossing border punch before stippling ballet blue ink over it then adhered using micro glue dots.  Once my main image panel was adhered, I added some Prima poinsettia flowers and leaf before sponging glorious green dye ink around the edges of the card to finish it off.

I'm entering this card into the following challenges:

Outlawz Festive Friday - 5/12/17

Pammie's Inky Pinkies 1720 - Anything Goes

Thanks for stopping by today.  Have a great day.

Stamps: Bugaboo Stella Santa Note, Stampin Up! Holiday Print
Ink: Tim Holtz Broken China, Stampin Up! Glorious Green, Ballet Blue
Card Stock: Stampin Up!
Accessories: Prismacolor and Copic Markers, Prima Poinsettia Flowers, Stipple Brush, Sponge, Martha Stewart Snowflake Embossing Border Punch, Brads, Glue Dots

Monday, May 15, 2017

The Eyes Of A Wolf


Hello and welcome to a new week.  I haven't been sleeping well the past few days thanks to pain, so I figured I'll try and take my mind off the pain and stamp something that doesn't require coloring.

I pulled out one of my favorite Stampin Up! sets, Wolf,  (long retired too) and try working with that.  I started out by taking the border stamp from the set and create my own background onto the card itself.  After finishing the background, I stamped the main image in Colorbox charcoal ink then lightly stippled basic grey and espresso ink over and around it before layering.  The only embellishment I added were black baby brads.  Once all of that was done, it was adhered using glue dots.  The sentiment is stamped out onto vanilla card stock scraps then punched out using an oval punch.  Once that was done, I lightly stippled basic grey ink around the saying before layering onto an oval layer.  I'm really happy with how this turned out especially with my lack of sleep.

I would like to enter this into the following challenges:

Outlawz Saturday Paper Ala Mode - Masculine cards

Pammies Inky Pinkies #1720-  Anything Goes

Thanks for stopping by today.  Have a great day.


Stamps: Stampin Up!
Ink: Stampin Up! Basic Grey, Colorbox Charcoal Chalk, Adirondack Espresso
Card Stock: Stampin Up!
Accessories: Making Memories Baby Brads, Stampin Up! Oval Punches, Glue Dots, Stipple Brushes

Saturday, May 13, 2017

Winner Winner Chicken Dinner!


Hello again everyone.  Thanks for stopping by.  I just found out today that I have been selected as one of the site wide winners and Monday Greetings Challenge winners over at The Outlawz.  This just made my day.

Have a great rest of your weekend.