Hello!! Today I am the Featured Designer over on Mark's Finest Papers blog as well as being the Stamp Artist of the Month for Oriental Stamp Art OSA. Today I am going to share with you the tutorial on how I make my vellum candles.
SUPPLIES:
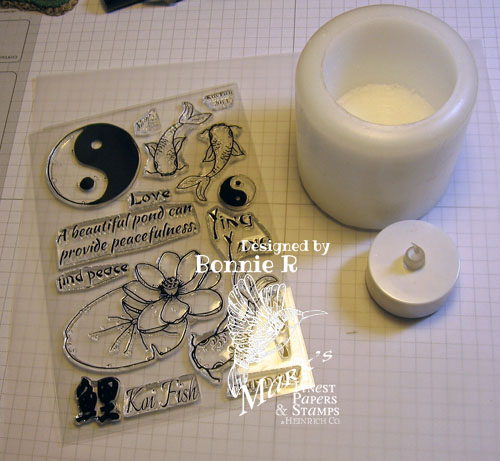
Stamps - Koi Fish, Dragonflies by Mark's Finest
Papers, a Heinrich Company
Memento Tuxedo Black Ink
Tim Holtz Tumbled Glass Distress Ink
Stipple Brush
Vellum Card Stock
Glue Dots
Black Marker
Candle
Battery Operated Votive
Googlie Eyes
Rose Art Colored Pencils
Drill Press (or other means to hollow out candle)
DIRECTIONS:
1. Using drill press, or other means, hollow out the
center of the candle deep enough for a battery operated votive to be placed inside
just below the rim.
2. Take vellum card stock and wrap it around the
candle. Then place a tic with a pencil
just below the top of the rim.

3. Next, cut the vellum card stock down to size length
wise.

4. Stamp images in memento tuxedo black ink, allow to
dry - overnight is best. You may speed up the drying time by using an
embossing gun, just make sure not to burn the vellum.

5. Flip stamped vellum image over, and on backside
color using varying shades of Rose Art colored pencils as desired.
6. Once
coloring is finished, add in dragonfly flight lines using a black marker and
allow to dry.
7. Stipple Tim
Holtz tumbled glass distress ink for the "pond" and allow to dry.

8. Wrap around
candle and attach using glue dots. Add
googlie eyes to koi fish using micro glue dots then ice stickles to lotus
flowers and lily pads - allowing to dry.
Place battery operated votive inside.

Very pretty candle and great instructions.
ReplyDeleteBonnie,
ReplyDeleteWow, beautiful and elegant and thanks for sharing your tutorial.